
How to Fix OBS Black Screen on Windows 11 Laptops
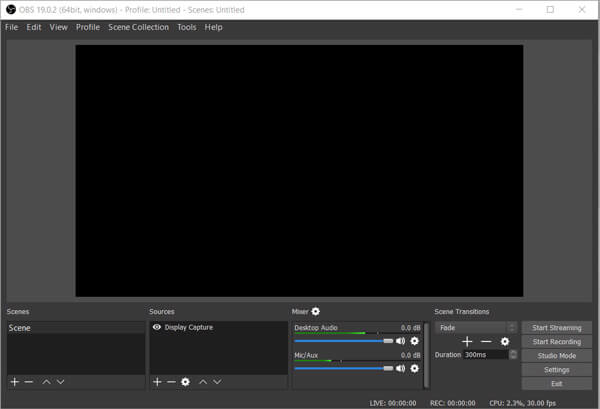
If you’ve ever opened OBS Studio on your Windows 11 laptop, added a Display Capture or Game Capture source, and been greeted with nothing but a black screen — you’re not alone. This is one of the most frustrating and commonly misunderstood issues in OBS, and the solution is almost never what generic troubleshooting guides tell you.
Here’s the truth most articles won’t explain clearly: the black screen happens because your laptop has two GPUs, and OBS is running on the wrong one.
Modern laptops ship with two graphics processors — an integrated GPU (Intel UHD or AMD Radeon) for everyday tasks, and a dedicated GPU (NVIDIA GeForce or AMD Radeon RX) for demanding workloads like gaming. Windows decides which apps use which GPU. When OBS runs on one GPU but tries to capture content rendered on the other, the result is a black screen.
This guide doesn’t just tell you to “change your GPU settings” — it explains why the fix works, so you’ll never have this problem again.
What Causes the OBS Black Screen on Laptops?
The root cause is a GPU mismatch between OBS Studio and what you’re trying to capture:
- Display Capture renders through the integrated GPU (power-saving). If OBS is set to use the dedicated GPU, it can’t see what the integrated GPU is drawing — hence the black screen.
- Game Capture renders through the dedicated GPU (high performance). If OBS is set to use the integrated GPU, same problem — black screen.
- Window Capture is less affected because it uses a different capture method, but can still fail in some configurations.
Other contributing factors include:
- Running OBS without administrator privileges
- Conflicting overlays (GeForce Experience, Discord, Steam)
- Outdated GPU drivers
- Hardware-accelerated apps (Chrome, Discord) interfering with capture
How to Fix OBS Black Screen (Step-by-Step)
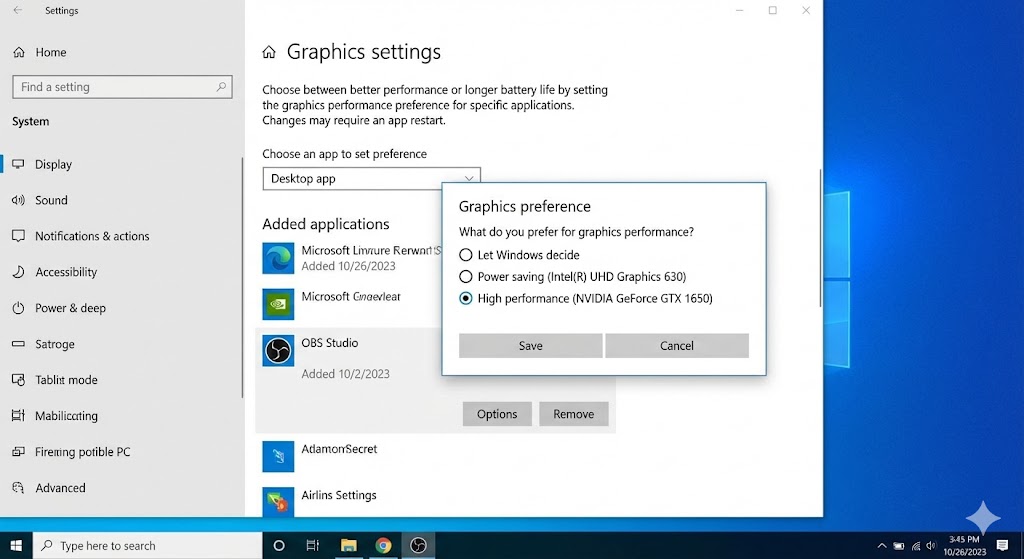
Method 1: Set the Correct GPU in Windows Graphics Settings (The Real Fix)
This is the fix that works for 90% of users. You need to tell Windows which GPU OBS should use.
-
Press Windows + I to open Settings, then go to System → Display → Graphics.
-
Click Browse and navigate to your OBS installation folder. The default path is:
C:\Program Files\obs-studio\bin\64bit\obs64.exeSelect
obs64.exeand click Add. -
Click on OBS Studio in the list, then click Options.
-
Choose the correct GPU based on what you want to capture:
| Capture Type | GPU Setting |
|---|---|
| Display Capture (desktop, browser, etc.) | Power saving (integrated GPU) |
| Game Capture (games, 3D apps) | High performance (dedicated GPU) |
- Click Save, then completely close and reopen OBS Studio (don’t just minimize — right-click the system tray icon and quit).
Pro Tip: If you need both Display Capture AND Game Capture, create two separate scenes — one for each. Never mix them in the same scene, as they require different GPU settings.
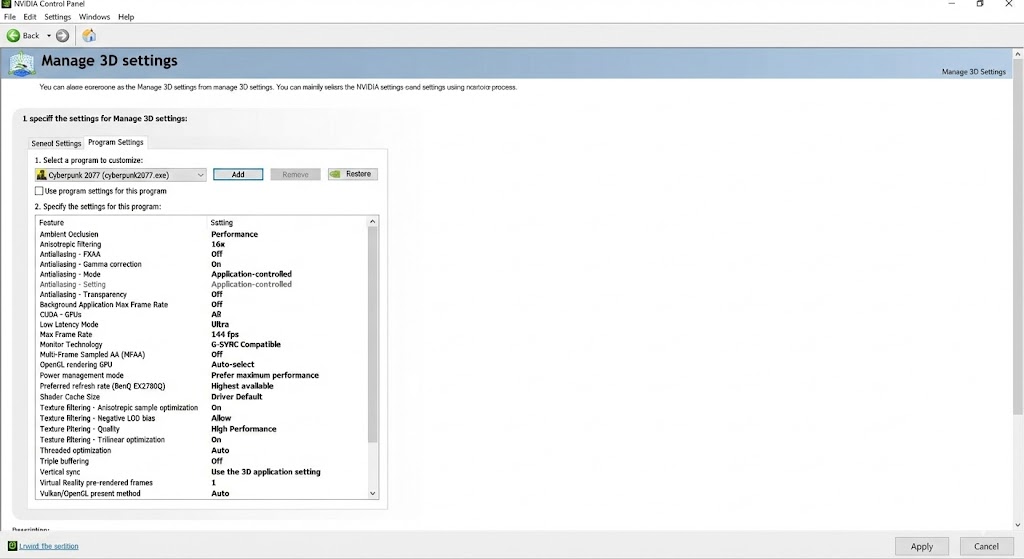
Method 2: Set GPU Preference via NVIDIA Control Panel
If Method 1 doesn’t work (or you want finer control), use the NVIDIA Control Panel directly.
-
Right-click on your desktop and select NVIDIA Control Panel (or search for it in Start).
-
Navigate to Manage 3D Settings → Program Settings.
-
Click Add and find
obs64.exe. If it’s not listed, click Browse and navigate to:C:\Program Files\obs-studio\bin\64bit\obs64.exe -
Under “Select the preferred graphics processor for this program,” choose:
- Integrated graphics for Display Capture
- High-performance NVIDIA processor for Game Capture
-
Click Apply, close NVIDIA Control Panel, and restart OBS.
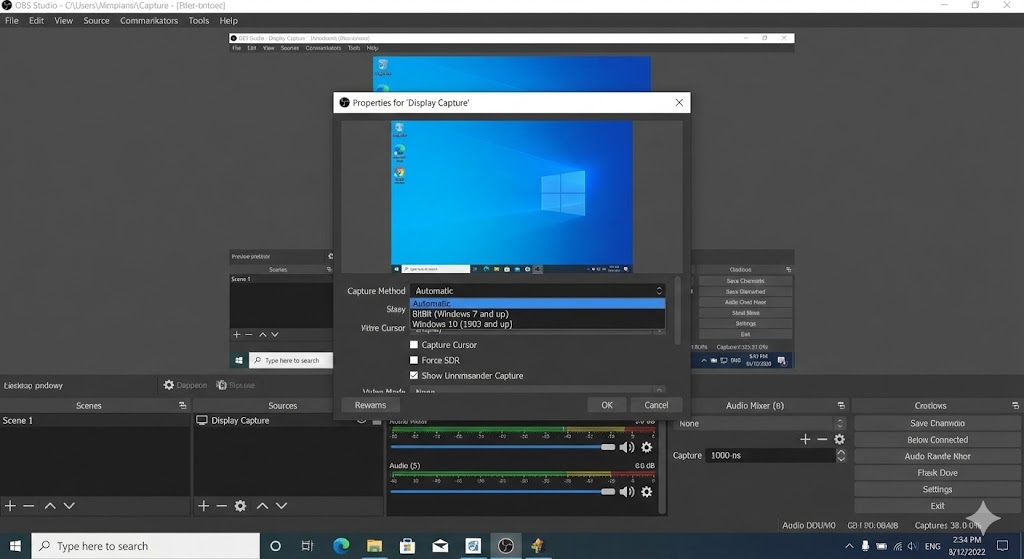
Method 3: Use the Correct Capture Method in OBS
OBS 27+ introduced a new capture method specifically for Windows 10 1903 and later. Make sure you’re using it.
- In OBS, right-click your Display Capture source and select Properties.
- Under Capture Method, change it to Windows 10 (1903 and up).
- Click OK and check if the black screen is resolved.
This method uses a newer Windows API (Windows Graphics Capture) that handles dual-GPU systems much better than the legacy methods.
Method 4: Disable Conflicting Overlays and Applications
Several apps run overlays that can interfere with OBS capture. Disable these before recording/streaming:
- NVIDIA GeForce Experience Overlay: Open GeForce Experience → Settings → General → toggle off “In-Game Overlay”
- Discord Overlay: Open Discord → Settings → Game Overlay → toggle off “Enable in-game overlay”
- Steam Overlay: Open Steam → Settings → In-Game → uncheck “Enable the Steam Overlay”
- Windows Game Bar: Press Windows + I → Gaming → Game Bar → toggle off
Also close hardware-accelerated apps:
- Google Chrome (uses GPU acceleration by default)
- Microsoft Edge
- Spotify Desktop
After disabling overlays, restart OBS and test again.
Method 5: Run OBS as Administrator
Some capture methods require elevated permissions to access GPU resources.
- Right-click the OBS Studio shortcut and select Properties.
- Go to the Compatibility tab.
- Check Run this program as an administrator.
- Click Apply → OK.
This ensures OBS has full access to all display outputs regardless of which GPU is being used.
Quick Reference: Which GPU Setting for Which Capture?
| Capture Source | Required GPU | Windows Setting |
|---|---|---|
| Display Capture | Integrated (Intel/AMD) | Power saving |
| Game Capture | Dedicated (NVIDIA/AMD) | High performance |
| Window Capture | Either (try both) | Start with Power saving |
| Browser Source | N/A (runs inside OBS) | No change needed |
Frequently Asked Questions
Q: I only have one GPU (desktop PC). Why am I still getting a black screen?
A: On desktop PCs with a single GPU, the black screen is usually caused by conflicting overlays (GeForce Experience, Discord), outdated GPU drivers, or running OBS without administrator privileges. Try Methods 4 and 5 above.
Q: The fix worked for Display Capture but now Game Capture shows a black screen. What do I do?
A: You can’t use both Display Capture and Game Capture with the same GPU setting. Create separate OBS scenes — one for desktop recording (power saving GPU) and one for game recording (high performance GPU). Switch between scenes as needed.
Q: Do I need to change the GPU setting every time I switch between Display and Game Capture?
A: Yes, unless you use Window Capture with “Compatibility Mode” as a workaround. However, Window Capture uses slightly more CPU. The cleanest solution is separate scenes with the appropriate GPU setting.
Q: Will this fix also work on AMD laptops (Radeon integrated + dedicated)?
A: Yes, the concept is the same. Use Windows Graphics Settings (Method 1) to set the GPU preference. AMD laptops don’t have a separate control panel like NVIDIA, so the Windows Settings method is your primary option.
Q: I tried everything and it still doesn’t work. What else can I try?
A: Update your GPU drivers to the latest version from NVIDIA/AMD’s website (not Windows Update). If that doesn’t help, try a clean reinstall of OBS Studio. As a last resort, use Window Capture with Compatibility Mode enabled — it’s slower but almost guaranteed to work.
Conclusion
The OBS black screen issue on Windows 11 laptops is almost always a GPU routing problem. The key takeaway: Display Capture needs the integrated GPU, and Game Capture needs the dedicated GPU. Set this correctly in Windows Graphics Settings, and the black screen disappears.
If you found this guide helpful, check out our other OBS and streaming tutorials: