
How to Fix Windows 11 Snap Layouts Not Working or Not Showing — The Feature That Hides Behind a Hover
Windows 11 has a feature that is genuinely useful — if you know it exists and if it actually works on your computer. It is called Snap Layouts, and it lets you arrange your windows into neat, organized layouts with a couple of clicks.
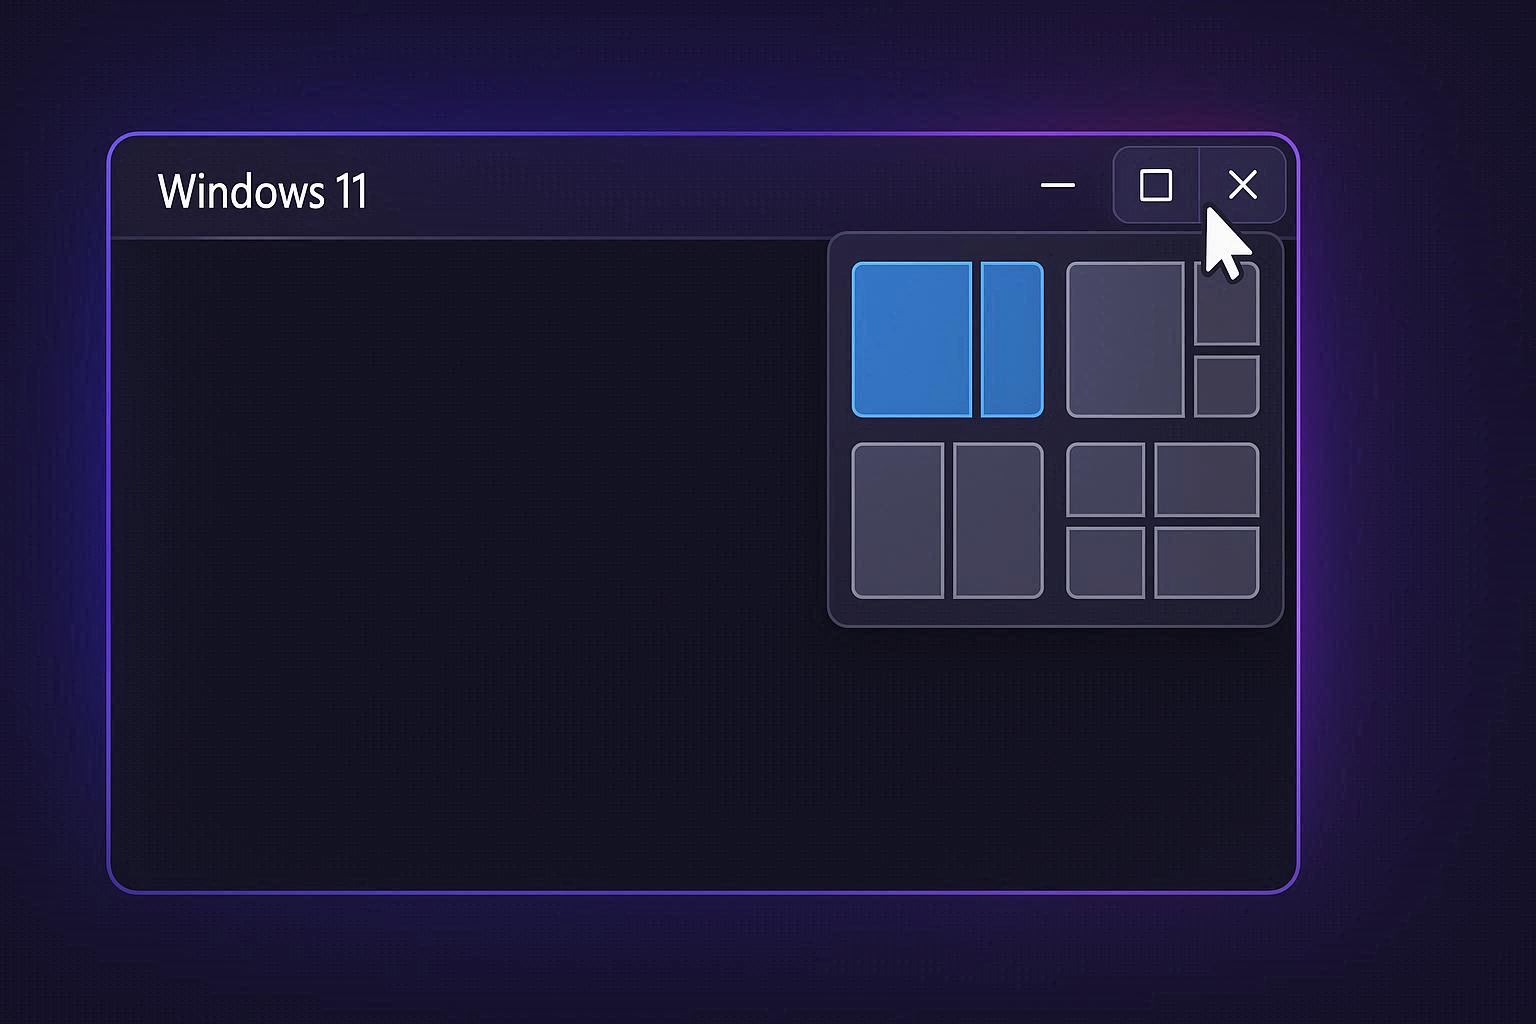
Here is how it is supposed to work: you hover your mouse cursor over the maximize button (the square icon in the top-right corner of any window). After a brief moment, a small grid appears showing six different layout options — side-by-side halves, three equal columns, a large window with two smaller ones stacked beside it, four equal quadrants, and a few other arrangements. You click the zone where you want the current window to go, and it snaps into place. Then Snap Assist shows your other open windows so you can fill the remaining zones.
When it works, it is the fastest way to organize a multi-window workspace. No dragging windows to edges. No manually resizing. Just hover, click, done.
When it does not work — which is frustratingly common — you hover over the maximize button and nothing happens. No grid. No layout options. Just a regular maximize button that makes the window full-screen when you click it. The feature might as well not exist.
Step 1: Check the Toggle (It Might Be Off)
The most common reason Snap Layouts do not appear is that the feature is simply disabled in Settings. This happens after Windows updates that reset settings, on work computers where IT administrators disable it through Group Policy, or when third-party window managers turn it off during their own installation.
Go to Settings → System → Multitasking.
At the top, make sure “Snap windows” is toggled On. Then click the arrow next to it to expand the sub-settings. You need these checkboxes checked:
- “Show snap layouts when I hover over a window’s maximize button” — this enables the hover grid
- “Show snap layouts when I drag a window to the top of my screen” — this shows layouts when you drag a window to the top edge
- “Show my snapped windows when I hover over taskbar apps, in Task View, and when I press Alt+Tab” — this enables Snap Groups
If any of these were unchecked, check them, and test immediately. Hover over any window’s maximize button — the layout grid should appear within about half a second.
Step 2: The Keyboard Shortcut Test
If hovering over the maximize button still shows nothing, try the keyboard shortcut:
Windows + Z opens Snap Layouts on the currently active window.
If Windows + Z shows the layout grid but hovering does not, something is intercepting the mouse hover event on the title bar. Common culprits:
PowerToys FancyZones: Microsoft’s own PowerToys suite includes a window management feature called FancyZones. If FancyZones is configured to handle window snapping, it can interfere with native Snap Layouts. Open PowerToys Settings → FancyZones → uncheck “Override Windows Snap” to let both systems coexist.
Third-party window managers: apps like DisplayFusion, AquaSnap, Divvy, or bug.n intercept title bar mouse events to provide their own snapping behavior. If you have any of these installed, check their settings for an option to allow Windows native snap alongside their own features, or temporarily disable them to test.
Custom title bar apps: some applications replace the standard Windows title bar with their own custom design. Electron-based apps (Slack, Discord, VS Code, Spotify) often use custom title bars. The maximize button looks similar but is not the actual Windows maximize button, so Snap Layouts cannot hook into it.
Test with a guaranteed-standard app: open Notepad or File Explorer (both use the standard Windows title bar) and hover over their maximize button. If Snap Layouts appear there but not in other apps, the issue is app-specific, not system-wide.
Step 3: Apps That Do Not Support Snap Layouts
Some applications will never show Snap Layouts on hover because they do not use the standard Windows title bar:
- Spotify Desktop: custom Electron title bar
- Some games: custom rendering bypasses the Windows shell
- Applications in compatibility mode: running an app in Windows 7 or 8 compatibility mode can disable title bar integration
- Java applications: Swing and JavaFX apps use their own window decorations
- Remote desktop windows: the inner session has its own title bar that the outer Windows session cannot detect
For these apps, use the keyboard shortcut Windows + Z instead, or use the drag-to-edge method:
- Drag to left edge: snaps window to the left half
- Drag to right edge: snaps window to the right half
- Drag to top-left corner: snaps to top-left quadrant
- Drag to top-right corner: snaps to top-right quadrant
- Drag to top edge: shows Snap Layouts (if enabled in Settings)
The drag-based snapping works with virtually all applications regardless of whether they use a custom title bar.
Step 4: Restart Explorer
If Snap Layouts were working earlier in the session and suddenly stopped — hover shows nothing where it used to show the grid — the shell may have glitched:
- Press Ctrl+Shift+Esc → Task Manager
- Find Windows Explorer
- Right-click → Restart
The taskbar disappears briefly and returns. Snap Layouts reinitialize with the Explorer restart. Test by hovering over a maximize button immediately.
If this fixes it temporarily but the problem recurs, check for memory-heavy applications that might be causing Explorer to become unresponsive. High memory pressure can cause Explorer’s UI features (including Snap Layout hover detection) to fail silently while basic window management continues working.
Step 5: Group Policy Check (Work Computers)
On company-managed computers, IT administrators can disable Snap Layouts through Group Policy:
- Press Windows + R → type
gpedit.msc→ Enter - Navigate to User Configuration → Administrative Templates → Desktop
- Look for a policy related to “Turn off Windows Snap” or “Prevent users from resizing windows”
- If any snap-related policy is set to Enabled, that is blocking the feature
On work computers, you may not have permission to change Group Policy settings. Contact your IT department if you need Snap Layouts enabled.
Using Snap Layouts Like a Power User
Once Snap Layouts are working, here are the most useful patterns:
The 50/50 split (most common): hover maximize → click the left zone in the two-column layout → select your second window for the right zone. Perfect for reference material on one side and your work document on the other.
The 70/30 split: on wide monitors (2560px+), the layout options include an asymmetric split — a large main window and a narrow sidebar. Great for coding with a terminal sidebar, or writing with a chat window alongside.
The quadrant layout: snap four windows into corners for dashboard-style monitoring — email top-left, Teams top-right, calendar bottom-left, browser bottom-right.
Keyboard-only snapping: Windows + Arrow keys snap windows without using Snap Layouts at all. Windows + Left Arrow snaps to the left half. Windows + Right Arrow snaps to the right half. Windows + Up Arrow maximizes. Windows + Down Arrow minimizes or restores. Combine them: Windows + Left then Windows + Up snaps to the top-left quadrant.
Snap Groups: after snapping two or more windows into a layout, they form a Snap Group. Hover over any of the grouped windows in the taskbar and you see the entire layout as a group. Click the group thumbnail to restore the entire arrangement at once. This is the fastest way to switch between a “work” layout and a “communication” layout without manually rearranging windows each time.
Snap Layouts are one of Windows 11’s best features hiding behind one of its worst discoverability designs. A hover over a maximize button — who would think to try that? Once you know it exists and get it working, arranging windows becomes effortless. The fix is usually just a Settings toggle, and for apps that do not support the hover, Windows + Z and drag-to-edge provide reliable alternatives.