
Fix Microphone Not Working on Windows 11 — Complete Troubleshooting Guide
You jump into a Zoom call and start talking. Nobody reacts. You check — you’re not muted. You tap the mic. The input bar doesn’t move. You try the Windows mic test. Nothing. Complete silence. When your microphone not working on Windows 11 problem hits, it feels like the end of the world — but here’s the thing: in almost every case I’ve dealt with, the mic hardware is perfectly fine. It’s Windows that’s the problem, not your gear.
I had a friend go through this exact nightmare right before a job interview. His Blue Yeti had been working perfectly the day before. He spent 45 minutes frantically reinstalling drivers, rebooting, even digging through Device Manager. The culprit? A Windows 11 update had silently flipped a privacy toggle that blocked microphone access to every single app on his system. No warning. No notification. No error message. Just a dead mic. He found it 5 minutes before the interview started.
This kind of thing happens way more often than Microsoft cares to admit. After every major Windows update, I get at least two or three messages from people whose mics suddenly stopped working. The fixes are almost always the same handful of things. The trick is knowing which one to check first and not wasting time on things that won’t help.
First — Is It the Hardware, or Is It Windows?
Before you change a single setting, do a 30-second diagnostic that tells you exactly where the problem lives.
Plug your headset or microphone into a completely different device — your phone, a friend’s laptop, a tablet, anything with a mic input. Does the mic work there? If yes, your hardware is 100% fine and the problem is somewhere in Windows. If no, you might genuinely have a broken mic, damaged cable, or dead USB port.
While you’re at it, check the embarrassingly obvious stuff. Is your headset plugged into the right port? I have absolutely spent 20 minutes troubleshooting a mic that was plugged into the headphone jack. The pink port is for microphones. The green port is for headphones or speakers. If you’re using a single-plug headset with a combo jack, make sure that jack actually supports mic input — many desktop front-panel jacks don’t, even though they look like they should.
For USB mics, try a different USB port. Specifically, try a port directly on the motherboard — the ones on the back of a desktop or on the sides of a laptop. Front-panel USB ports and hubs sometimes don’t deliver enough power for condenser microphones that need phantom power over USB.
For Bluetooth mics or headsets, go to Settings > Bluetooth & devices and make sure the device shows as “Connected” with “Connected voice, music” or similar. If it only says “Connected music,” the mic profile hasn’t been activated. Remove the device and pair it again — this forces Windows to renegotiate all available Bluetooth profiles.
Also, check the physical mute switch if your headset or mic has one. I know this sounds stupid, but I’ve had people bring me “broken” mics where the physical mute was switched on. The mute light is easy to miss, especially on headsets where the switch is tiny or the LED is dim.
If hardware checks out, let’s fix Windows.
Fix 1: Why Your Microphone Not Working on Windows 11 — The Privacy Setting Microsoft Changed
Starting with Windows 11 22H2, Microsoft significantly reorganized the microphone privacy settings. What used to be clearly visible in the main Settings page got buried under multiple layers, and certain cumulative updates have been known to flip these settings off without any notification whatsoever. According to Microsoft’s official microphone troubleshooting documentation, this privacy toggle is the very first thing you should check — because it blocks everything.
Open Settings > Privacy & security > Microphone. According to Microsoft’s microphone troubleshooting guide, this privacy layer is the first thing to check. At the very top of this page, there’s a master toggle labeled “Microphone access.” If this is OFF, no application on your entire system can access your microphone. Not Zoom. Not Discord. Not even Windows’ own voice recorder. Everything is blocked at the system level.
Below that master toggle, there’s a second one: “Let apps access your microphone.” This one controls whether individual apps can even ask for microphone permission. If this is OFF, apps won’t even see your microphone as an available device.
Scroll further down and you’ll see a list of every app that has ever requested microphone access, each with its own toggle. Microsoft Edge, Camera, Voice Recorder, Xbox Game Bar, and every third-party app you’ve used — each one has an independent switch. An app can be listed here but toggled OFF, meaning it will see your mic as completely unavailable even though everything else works.
In my experience, the “Microphone access” master toggle is responsible for roughly 40% of the “my mic suddenly stopped working” calls I get. It gets flipped off during feature updates, and since there’s no notification, people have no idea it happened. My friend’s pre-interview panic? This exact toggle was off.
Fix 2: Is Windows Actually Using the Right Microphone?
Your PC might have half a dozen audio input sources and you don’t even realize it. Your USB headset mic. Your webcam’s built-in microphone. Your laptop’s internal microphone array. Your monitor’s audio return channel over HDMI. Even your graphics card can show up as an audio input device if it supports audio over DisplayPort.
Windows has a nasty habit of switching the default input device after updates, after unplugging and replugging USB devices, or even after waking from sleep. It will silently decide that your webcam mic is now the default instead of your headset, or worse — it’ll pick an HDMI audio input that doesn’t even have a microphone attached.
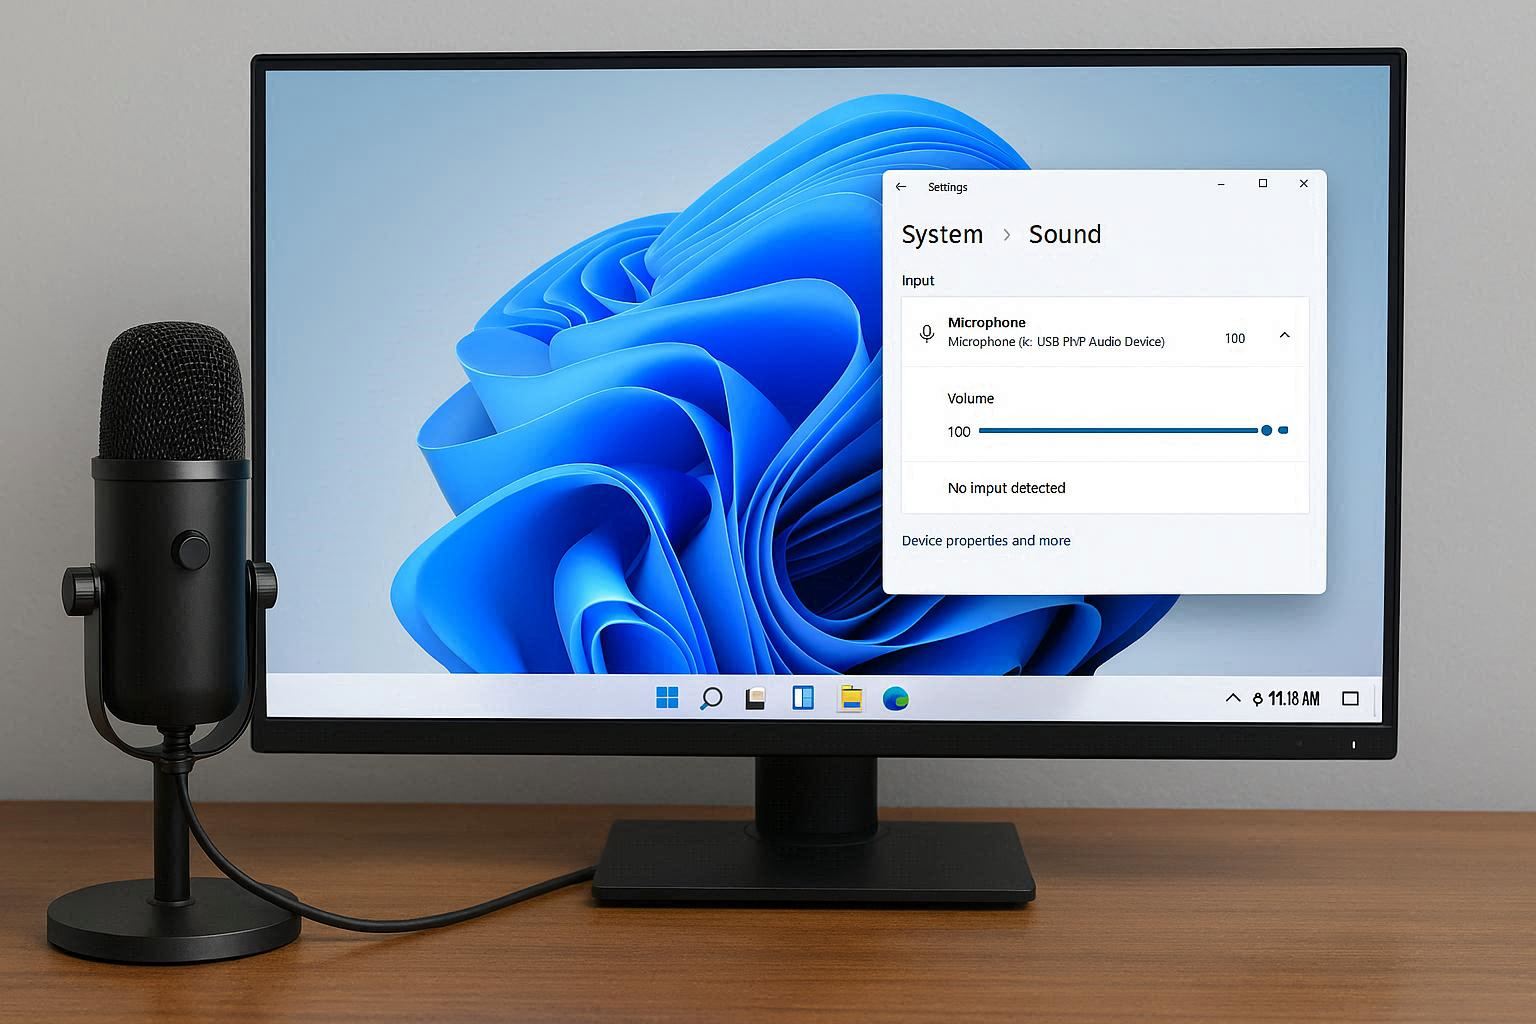
Go to Settings > System > Sound. Under the Input section, look at “Choose a device for speaking or recording.” The device listed here is what Windows considers your primary microphone. Click the dropdown and verify that your actual microphone is selected — look for the brand name or model, not generic labels like “Microphone Array” (that’s your laptop’s built-in mic) or “Digital Audio Interface” (that’s probably HDMI).
Now click the arrow (or “>”) next to your selected microphone. You’ll see a volume slider and a “Test your microphone” section. Click “Start test” and speak into your mic at a normal volume. You should see the blue bar moving in response to your voice. If the bar doesn’t move at all, drag the Volume slider up to at least 80. Then scroll down slightly and find “Audio enhancements” — try turning this OFF. Audio enhancements are supposed to improve quality with noise cancellation and echo suppression, but on certain hardware configurations they completely kill the microphone input. I’ve seen mics go from dead silent to perfectly working just by toggling this one switch off.
Fix 3: The Hidden Volume Levels Windows Doesn’t Show You
The modern Windows 11 Settings app shows you one microphone volume slider. But there’s a completely separate set of controls hidden in the classic Control Panel sound settings, and these often get set to zero or muted without the main Settings app reflecting it.
Right-click the speaker icon in your system tray. Click “Sound settings.” This is the same classic Control Panel you’d use for fixing general sound problems on Windows 11. Scroll all the way down past everything and click “More sound settings.” This opens the classic Sound control panel from older versions of Windows.
Click the Recording tab at the top. You’ll see a list of every audio input device your PC knows about. Find your microphone — it should have a green checkmark if it’s the default device. Right-click it and select Properties.
Go to the Levels tab. Here’s where the hidden controls live. There’s a main volume slider that should be at 80-100%. Below it, many microphones show a “Microphone Boost” option — this is an amplifier gain setting that boosts the raw signal before Windows processes it. If your voice is too quiet even at 100% volume, try Microphone Boost at +10dB or +20dB.
While you’re on this tab, check that the speaker icon next to the volume slider doesn’t have a red circle with a line through it — that means the mic is muted at the driver level, and the Settings app won’t show this mute state. Click the icon to unmute if needed.
This hidden volume level is a relic of the old audio stack that Microsoft hasn’t fully integrated into the new Settings UI. I’ve lost count of how many times I’ve found the mic muted here while everything in Settings looked perfectly normal.
Fix 4: Exclusive Mode and Audio Format Settings
Still in the Recording tab right-click menu > Properties, click the Advanced tab. There are two checkboxes under “Exclusive Mode” that control how applications interact with your microphone at a deep level.
“Allow applications to take exclusive control of this device” — when checked, apps like Discord, Zoom, or OBS can take full control of your microphone, adjusting its settings directly for optimal quality. This is usually what you want for professional audio and streaming. But if multiple apps try to grab exclusive control at the same time, or if an app crashes while holding exclusive control, your mic becomes inaccessible to everything else.
“Give exclusive mode applications priority” — this determines whether an app that wants exclusive control can kick other apps off the mic. If this causes conflicts, try unchecking it while leaving the first box checked.
Experiment with both combinations. On my own setup, I run with both unchecked because I frequently switch between Discord and OBS while both are open. Having exclusive mode off prevents either app from stealing the mic from the other.
Also important on this tab: the “Default Format” dropdown. This controls the sample rate and bit depth of your microphone. Set it to “2 channel, 16 bit, 48000 Hz (DVD Quality)” — this is the standard format that every application supports. If your mic is set to something exotic like “1 channel, 24 bit, 192000 Hz (Studio Quality),” some applications literally can’t process the audio stream and show your mic as silent. I’ve seen this most often with USB condenser mics that default to the highest possible quality setting.
If you change any settings on this tab, click Apply, then test the mic again with the “Test your microphone” function back in Settings.
Fix 5: Reinstall the Audio Driver from Scratch
If all settings look correct and the mic still refuses to work, the audio driver itself may be corrupted. This happens surprisingly often after Windows updates, particularly with Realtek audio chips that are in the vast majority of laptops and many desktop motherboards.
Open Device Manager (right-click Start > Device Manager). Expand “Audio inputs and outputs”. If you’ve ever dealt with Windows audio output problems, the driver reinstall process here is almost identical. — you’ll see your microphone listed here. Right-click it and select Uninstall device. Don’t check “Delete driver” yet — just uninstall for now.
Now expand “Sound, video and game controllers.” Find your audio controller — it’ll be something like “Realtek High Definition Audio,” “Intel Smart Sound Technology,” “NVIDIA High Definition Audio,” or “AMD High Definition Audio Device.” Your primary audio controller is usually the Realtek or Intel one. Right-click it > Uninstall device. This time, check the box for “Delete the driver software for this device” if it appears. This ensures Windows downloads a completely fresh driver instead of reinstalling the potentially corrupted one.
Restart your PC. Windows will automatically detect the hardware and install fresh drivers during boot. After restarting, check if the mic works.
Here’s where a lot of people go wrong: they stop at the generic Windows driver. The driver Windows Update installs is functional but basic — it gets audio working at a minimum level. For full microphone functionality including noise cancellation, beamforming (on multi-mic arrays), and proper gain control, you need the manufacturer-specific driver.
Go to your laptop or motherboard manufacturer’s support website. Search for your exact model. Download the latest audio driver package. For Dell, it’s on dell.com/support. For HP, support.hp.com. For Lenovo, pcsupport.lenovo.com. For ASUS, asus.com/support. Install the driver and restart again.
If you’re using a desktop with a Realtek chip and can’t find drivers from your motherboard manufacturer, you can try the generic Realtek HD Audio driver directly from Realtek’s website — but the manufacturer version is always preferred because it includes model-specific audio processing.
Fix 6: The Windows Audio Troubleshooter and Network Reset
If you’ve been through everything above and the mic is still dead, there are two more things worth trying before you consider hardware failure.
The built-in Windows audio troubleshooter: Settings > System > Troubleshoot > Other troubleshooters > Recording Audio > Run. This automated tool checks for common audio service issues, driver conflicts, and misconfigurations. I’ll be honest — built-in troubleshooters usually aren’t great. But the audio one is one of the few that actually catches things. I’ve had it detect and fix “Windows Audio service not responding” issues that manual checking completely missed.
If the troubleshooter doesn’t help, try resetting all audio settings to default. Settings > System > Sound > Volume mixer > Reset. This clears any per-app volume and device preferences that might have gotten corrupted.
As an absolute last resort before hardware diagnosis, you can try resetting the entire Windows audio service stack. Open Command Prompt as Administrator and run these commands:
net stop audiosrv
net stop AudioEndpointBuilder
net start audiosrv
net start AudioEndpointBuilder
This stops and restarts the core Windows audio services. Any stuck audio processing pipelines get cleared. Restart your PC afterward and test the mic again.
When It’s Still Not Working — Hardware Diagnosis
If your mic works perfectly on another device but refuses to work on your PC after every fix above, you may have a physical hardware problem with your PC’s audio jack, USB controller, or motherboard audio chip.
Test with a USB microphone if you’ve been using the 3.5mm jack — USB mics bypass the Realtek audio chip entirely and use their own built-in audio processing. If a USB mic works but the 3.5mm jack doesn’t, the problem is your PC’s onboard audio hardware or the physical jack itself.
Conversely, if you’ve been using a USB mic and it’s not working, try a 3.5mm mic. This isolates whether the problem is with USB audio or with all audio input.
Some gaming headsets with a single 3.5mm plug (TRRS connector, which combines audio and microphone in one connector) require a Y-splitter cable to work with PCs that have separate headphone and microphone jacks. Without the splitter, you’ll get audio but no mic. These splitters cost about five bucks and are available at any electronics store.
Bottom Line
Microphone problems on Windows 11 are almost never hardware failure. I’d estimate maybe 5% of the “broken mic” cases I see are actual hardware issues. The other 95% are one of the things in this guide — a privacy toggle, the wrong input device, a hidden mute, an audio enhancement bug, or a corrupted driver.
Work through it like this: check privacy settings first (this alone fixes maybe 40% of cases), verify the correct device is selected (another 30%), check the hidden volume levels in classic Control Panel (15%), adjust exclusive mode and format settings (10%), reinstall drivers (5%). Add the troubleshooter as your cleanup hitter. One of these will get your mic working again.